
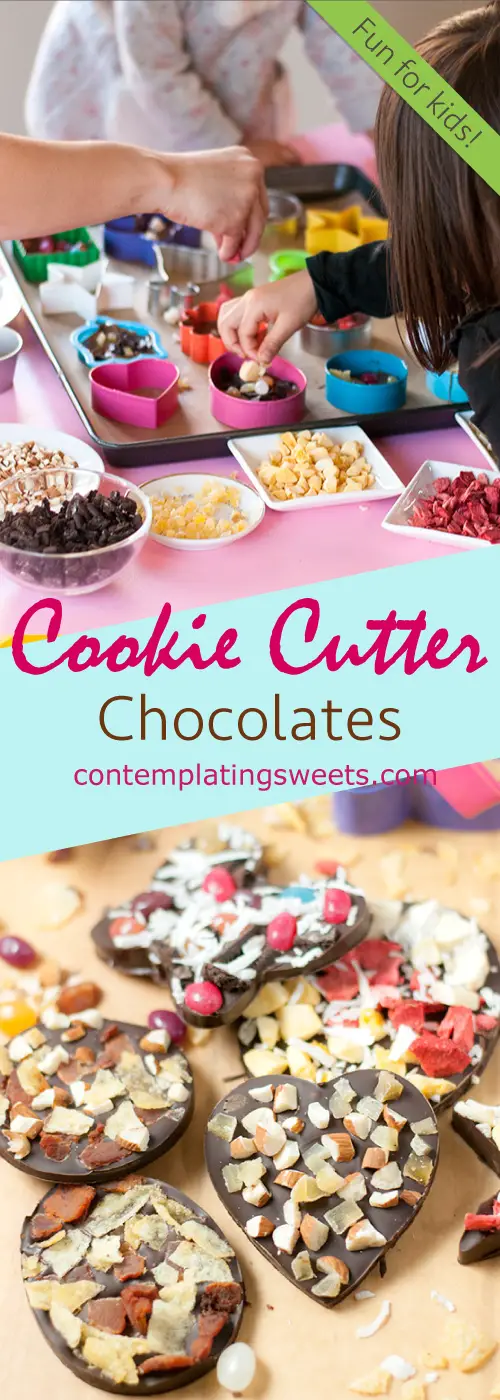
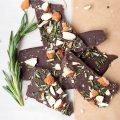
This cookie cutter candy chocolate recipe is a great activity to do with kids! Melted chocolate is poured into cookie cutter molds and topped with all sorts of fun toppings!
Today’s post is part of a blogger Easter “virtual party”! Check out great Easter recipes from my blogger friends! Links are at the bottom of the post!
A couple of weeks ago I posted my rosemary sea salt chocolate bark, geared more towards adults. Today I want to share a fun chocolate bark activity for kids!
How many of you parents like to cook with your kids? I’m in the kitchen so much, you would think I’d let my kids join in once in a while, right? I’m actually guilty of the opposite. I’m constantly telling my kids to “go play”, “go outside”, “shall we turn on a movie?”(their favorite).
The problem is, when kids mix things in a bowl… some of it always ends up on the table, and the floor, and their hair…
I let them help me occasionally, when I’m feeling extra patient. It often turns out well, and is a positive experience for us all. On the flip side, I’ve also found myself snapping and nagging at them, and I’m afraid that I will make the kitchen a negative place for them. How sad would that be?
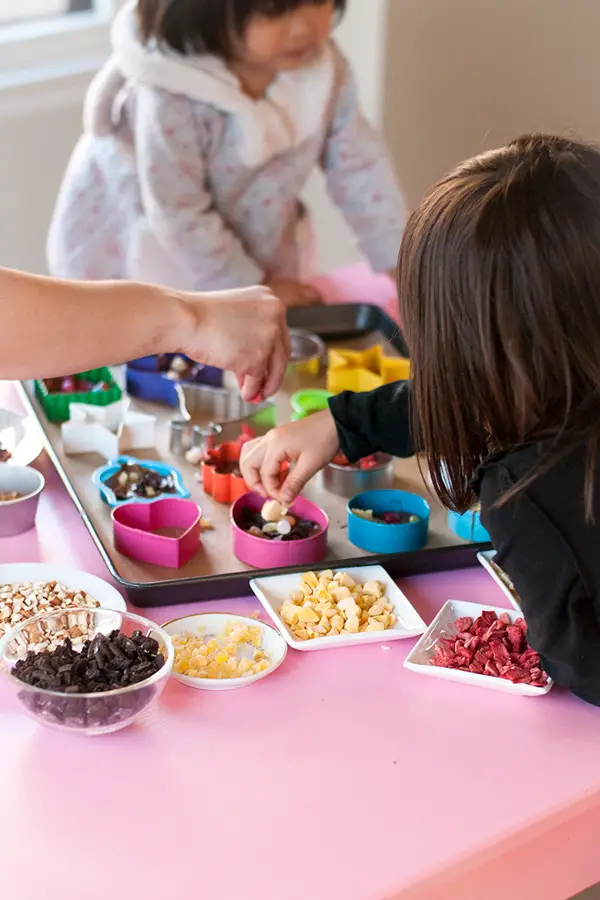
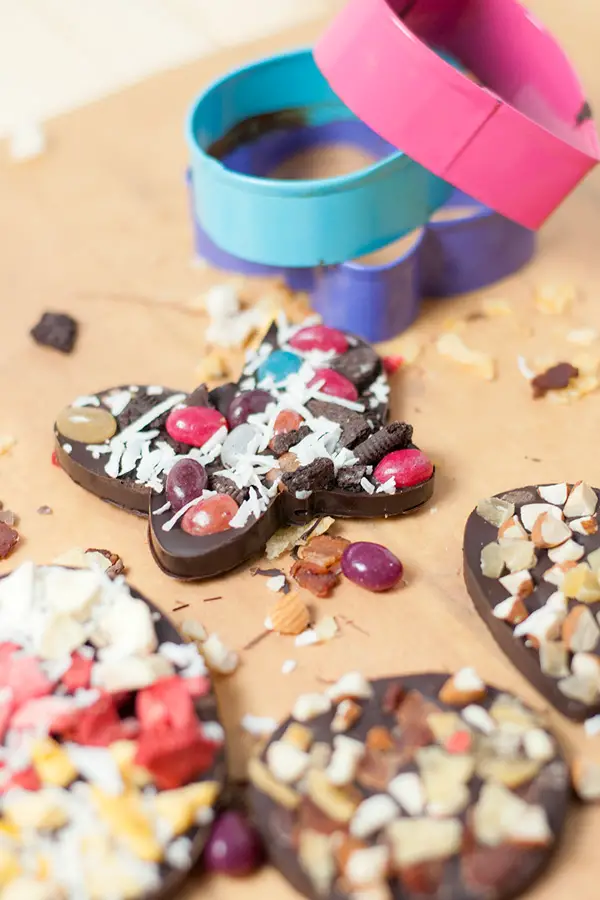
But THIS cookie cutter candy chocolate recipe, if you can even call it that, is perfect for kids! It’s such a fun and easy project where you can give your kids lots of creative freedom. Be prepared to do a little sweeping afterwards, but you don’t have to worry about spills “messing up” your final product.
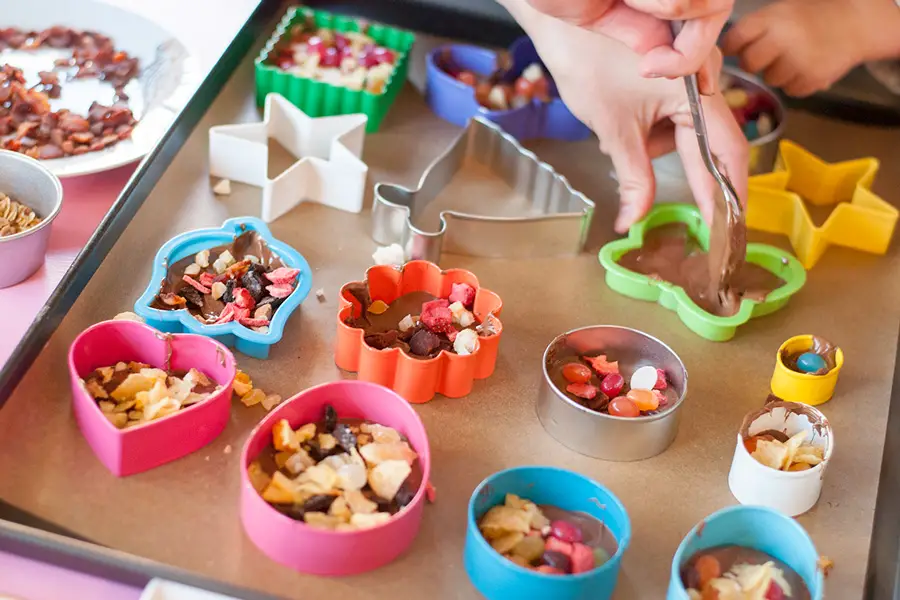
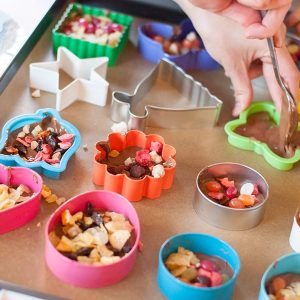
It’s really really simple. Melt the chocolate, pour into the cookie cutters, and top top topping away! Depending on the age of your children, they can even pour the chocolate into the molds!
The two issues I ran into are: 1. I didn’t get the milk chocolate melted enough to pour well, so it was a bit more blobby and I had to spread it out with a spoon. No problem, still turned out fine. 2. If a child bumps the cookie cutter after you put the chocolate in, it will have a little bit that sticks out. You can see that in several of the pictures. Also no big deal.
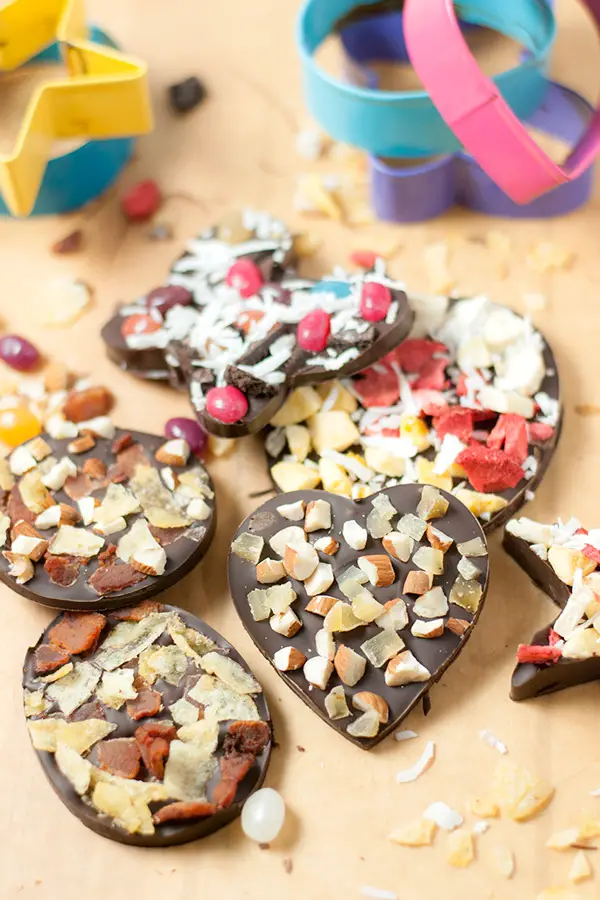
Candy Chocolate Recipe Toppings
Really, this recipe is easy and fun, and you can get SO creative with the toppings on the cookie cutter chocolates!
Here are the toppings I chose:
Jelly beans, freeze dried fruit (strawberries, mangoes, bananas), shredded coconut, crumbled bacon, potato chips, granola, chopped almonds, crumbled oreo-type cookies, and candied ginger.
Honestly, my kids would’ve been even happier if I had sprinkles and more candy.
So what are you going to put on yours?
This would be such a fun activity to do on Easter as a family. Also, make sure to check the links below for other Easter recipe ideas!
Easter Recipes
#BloggersDoEaster
Spring Roasted Carrot Noodle Salad with Thyme Vinaigrette from No Spoon Necessary
Earn Serious Bunny Points, And Make Easter Basket Cupcakes from The Sweet Nerd
Maple Bacon Deviled Eggs from Beyond Mere Sustenance
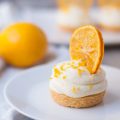
Lemon Curd Pavlova from Seasons and Suppers
Blood Orange Wheat Ale Pound Cake with Blood Orange Glaze from Beer Girl Cooks
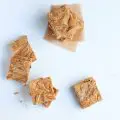
Easter Mini Egg Cookie Bars from Salt and Lavender
Ham and Cheese Scones from Kevin is Cooking
Marbled Easter Egg Truffles from Sugar Hero
Angel Food Cupcakes with Compote Filling from Meg is Well
Spring Green Salad with Asparagus from Seasonal Cravings
Ingredients
- 1 lb chocolate of choice
- 16 cookie cutters approximately
Order Supplies Online

Instructions
Prep
- Grease each cookie cutter. Spray cooking spray onto a paper towel, and rub along the inside of each cutter.16 cookie cutters
- Line a large baking sheet, or two regular sized baking sheets, with parchment paper. Place cookie cutters on parchment paper. Make sure to choose cookie cutters that have a relatively flat bottom. If it's too lopsided or bent out of shape, chocolate can leak out from the sides.
- Prepare all of your toppings, and place them in small bowls around the baking sheets, so you have easy access to them all.freeze dried fruits,sprinkles,crumbled cookies,bacon,potato chips,chopped nuts,etc. etc. etc.!
Make Chocolate
- Place the chocolate, chopped in pieces, in a microwave safe/double boiler safe bowl.1 lb chocolate of choice
- Melt the chocolate over a double boiler, or in the microwave in thirty second increments, stirring well after each, until melted.
Assemble
- When the chocolate is melted, pour about an ounce of chocolate into each cookie cutter, while holding the cookie cutter steady with the other hand. If the chocolate doesn't spread into all the corners, use a spoon to spread the chocolate out.
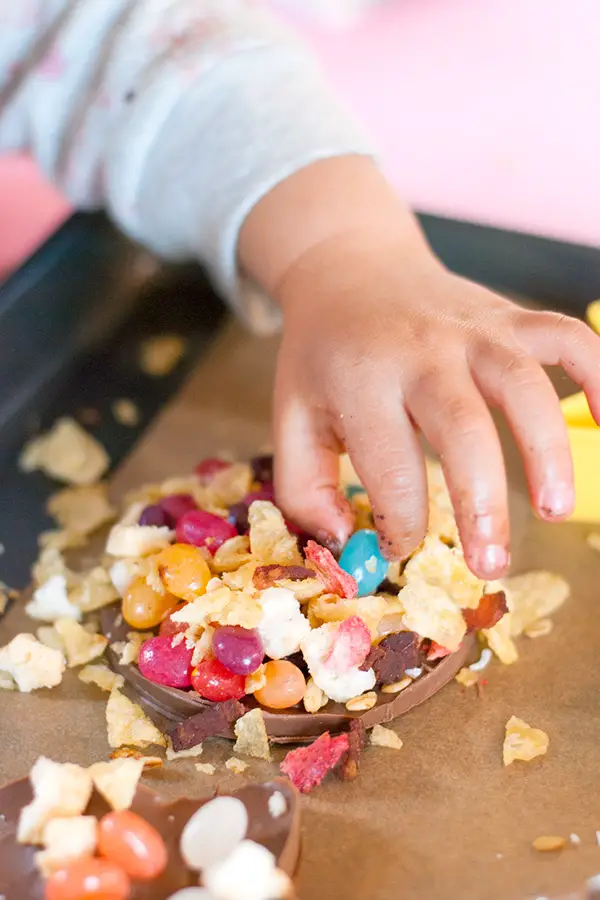
- Immediately start topping the chocolate with the different toppings. Gently press the toppings into the chocolate to make sure it sticks.
Cool
- Allow chocolate to cool and harden. You may want to place it in the fridge to help it harden quicker.
- Once completely hardened, gently press the chocolate around the edges and pop out of the cutter. If it doesn't come out easily, try warming the sides up with your hands, to slightly melt the chocolate.
Store
- Store in a cool place, or in the fridge in a sealed container.
Notes
Nutrition

This is such a cute idea! I have a 5-year old who would LOVE this. We’re going to try it for an upcoming weekend project!
Thanks Elizabeth! At that age, I think it would be really fun to let the kids choose what toppings to buy/prepare for it too!
Thank you for this post. I am the same way with my kids when it comes to cooking or baking in the kitchen. I tell them, you can only be in the kitchen if you are going to clean it. But lately I have been involving my daughter more because she is 4 and getting quite skilled. This will be a fun recipe to involve the 2 year old also. Thank you!
Yes mine are 4.5 and 2.5 and they both loved it!
Oh these are so fun. I love the idea of pouring them into molds. And yummy jelly beans! I am in!
Thanks Cindy! My kids’ favorite topping was the jelly beans! Actually, I think they were my favorite too ?
Having raised 4 boys in the kitchen (and all of them are fabulous cooks as adults), I enthusiastically support any activities that get little ones comfortable preparing food. This looks like so much fun, and simple enough for parents to relax a bit. Happy Easter!
That’s awesome! I hope my kids will be that way! My mom was a good cook but I had zero interest, so I didn’t learn to cook until I became a stay at home mom and HAD to!
These are so cute! Its like a craft session but at the end you get delightful treats to eat!
That’s a great way to put it! 🙂
You had me laughing out loud! I only have to worry about my dog or my family eating my creations before I can take pictures. This looks so fun and it’s a great Easter decoration activity!
Thanks Meg! It was a lot of fun!
What fun for the kiddos and I’d love one or three myself! 🙂
Ha! We thought about giving them away to neighbors, but I stuck them in a bag in the freezer and I’ve been eating it every day ;).
This is actually a really good idea! I would never have thought of it myself. Fun for any age! 🙂
Thanks Natasha, and yes, cookie cutters have so many uses huh?
This is such a fun and cute idea! I’m sure your adorable kiddos loved making these!
Thank you! They most definitely did!
So cute! And so much fun. I love treats that everyone can participate in creating 🙂
Thank you! Me too, I don’t do it enough though 😐
What a wonderful idea! We’ve just been making a chocolate bark with my son. I bet he’ll be happy to try this recipe next.
Definitely! Chocolate bark is such a great activity with kids :), it’s really hard for it to go wrong!
These are so fun!! What a cute little project, not to mention tasty! A win win! Extra everything for me 🙂
These chocolates are so adorable!! My husband and I only have children that walk on all 4’s, but him and I love spending time together in the kitchen… and we are both big kids at heart, so I’m thinking this is kiiiinda perfect for us! 🙂 I’m definitely passing on this link to my sister, because I know my niece and nephew would love making these! I’ll be putting ALL the toppings on mine! Cheers!
Thanks Cheyanne! And of course, chocolate is for everyone! It’s super customizable, so adults can have fun too. I used candied ginger pieces on some of mine, which my kids did NOT like!
These are so adorable and I know my kids would love this. We are looking for activities since we are on break for a week and a half! I’m sure my kids would have the toppings piled high on these babies!
Mine topped them so high that they weren’t sticking anymore haha. But they just picked it off the top and ate it anyways ;).
I hear you on cooking with the kids. I have to be feeling patient, or else it just ends up be not fun for anyone. These looks really run and easy thought. Thanks!
Yes, it’s all about picking the right recipe and being in the right mood!
Hi Alisa! Absolutely love treat like this that gets the whole family involved 🙂 They look delicious!
Thank you Jennifer!